
Digital Ocean
Pegasus provides native support for Digital Ocean App Platform. To build for Digital Ocean, choose the “digital_ocean_app_platform” option when installing Pegasus. Then follow the steps below to deploy your app.
Deploying a basic application to Digital Ocean App Platform can be expensive for hobby projects, with costs ranging from $20-$55/month on the smallest hardware options.
For a basic Django application the minimum requirements will be as follows
- 1 App server ($5/month)
- 1 Postgres database ($15/month)
However, if you want to use Celery the costs will increase, by adding:
- 1 Celery worker ($10/month)
- 1 Celery beat worker (if using scheduled tasks) ($10/month)
- 1 Redis database ($15/month)
These numbers were last updated in August, 2025.
Prerequisites
Section titled “Prerequisites”If you haven’t already, create your Digital Ocean account. You can sign up with this link to get $100 credit and help support Pegasus.
Next, install and configure the doctl command line tool by following these instructions.
Additionally, you must connect Digital Ocean to your project’s Github repository. This can be done from inside App Platform, or by following this link.
Set up Databases
Section titled “Set up Databases”Before you can deploy you will need to set up databases for your application.
First, navigate to Databases —> New, and choose “PostgreSQL” and the latest version (as of this writing, v18).
You can leave most of the settings as-is, though feel free to change as you want. The smallest size should be fine for most applications getting stared.
For the database cluster name it’s recommended to use <your-project>-db to match
the default value expected by Pegasus.
If you are planning to use Celery or Redis (Valkey), you’ll also have to create that Database.
Repeat the process above, but choosing “Valkey” for the database type.
For your Redis database cluster name, it is recommended to use: <your-project>-redis to match
the default value expected by Pegasus.
Deploying
Section titled “Deploying”Once you’ve configured the prerequisites and set up your databases, deploying is just a few steps.
First, edit the /deploy/app-spec.yaml file. In particular, make sure to set your Github repository and branch.
Also, if you did not use the database naming conventions above, then you will have to adjust your
database cluster_name values to the ones you chose for Postgres and Redis/Valkey, respectively.
If you don’t need Celery, you can remove the sections related to Redis, and the workers (celery and celery-beat). This will substantially reduce the costs of running your app (the workers are $20/mo and Redis is $15/mo).
Once you’ve made all the edits to the app-spec.yaml file you can deploy your app by run the following command:
doctl apps create --spec deploy/app-spec.yamlThat’s it! In a few minutes your app should be online. You can find and view it here.
Once your app is live, you should restrict access to your Postgres and Redis/Valkey instance, by navigating to each database in the Digital Ocean console and setting your app as a “trusted source” and saving. Failure to do this may result in your app’s data and infrastructure being exposed to the public.
After deploying, review the production checklist for a list of common next steps.
Settings and Secrets
Section titled “Settings and Secrets”App platform builds use the settings_production.py file.
You can add settings here, and use environment variables to manage any secrets, following the pattern used
throughout the file.
Environment variables can be managed in the Digital Ocean dashboard as described here.
Running One-Off Commands
Section titled “Running One-Off Commands”The easiest way to run once-off commands in your app is to click the “console” tab in app platform and just type in the command. See the screenshot below for what it looks like:
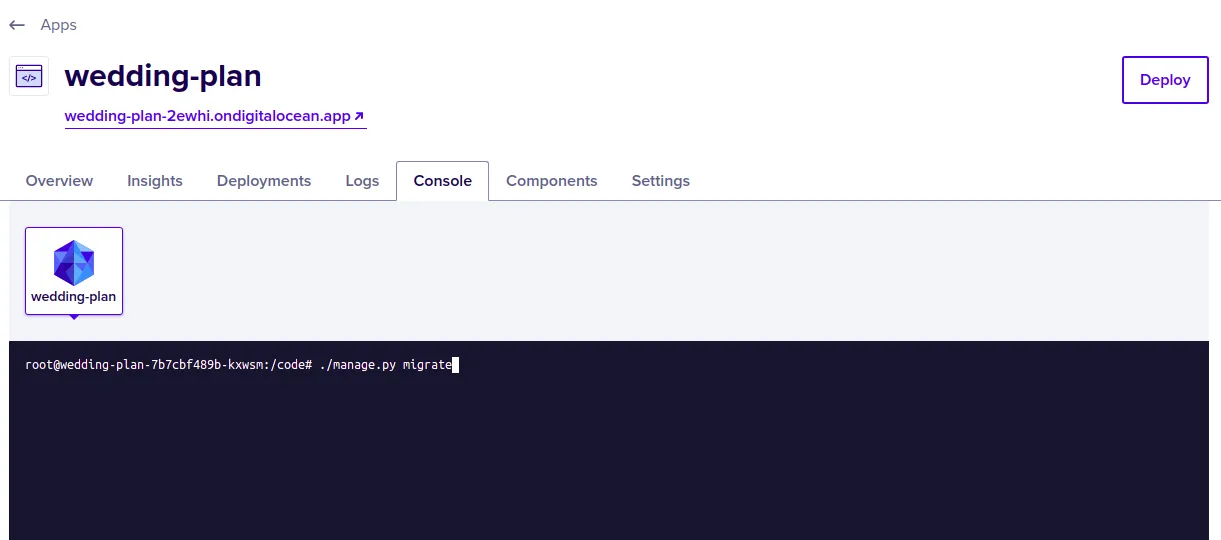
You may also need to run additional commands to get up and running, e.g. ./manage.py bootstrap_subscriptions
for initializing your Stripe plan data.
Celery Support
Section titled “Celery Support”Celery should work out-of-the box.
If you have issues running celery, ensure that you have created a Redis database, and that the values for the
REDIS_URL environment variables match the name you’ve chosen.
If you need to run celerybeat (for scheduled/periodic tasks), you’ll have to add a second worker to your
app-spec.yaml file. You can copy and paste the configuration for the celery worker, but replace
the run_command with the following line (swapping in your app name for your_app):
celery -A your_app beat -l INFONote that simply adding --beat or -B to the existing Celery worker does not work on app platform.